 (850) 753-0041


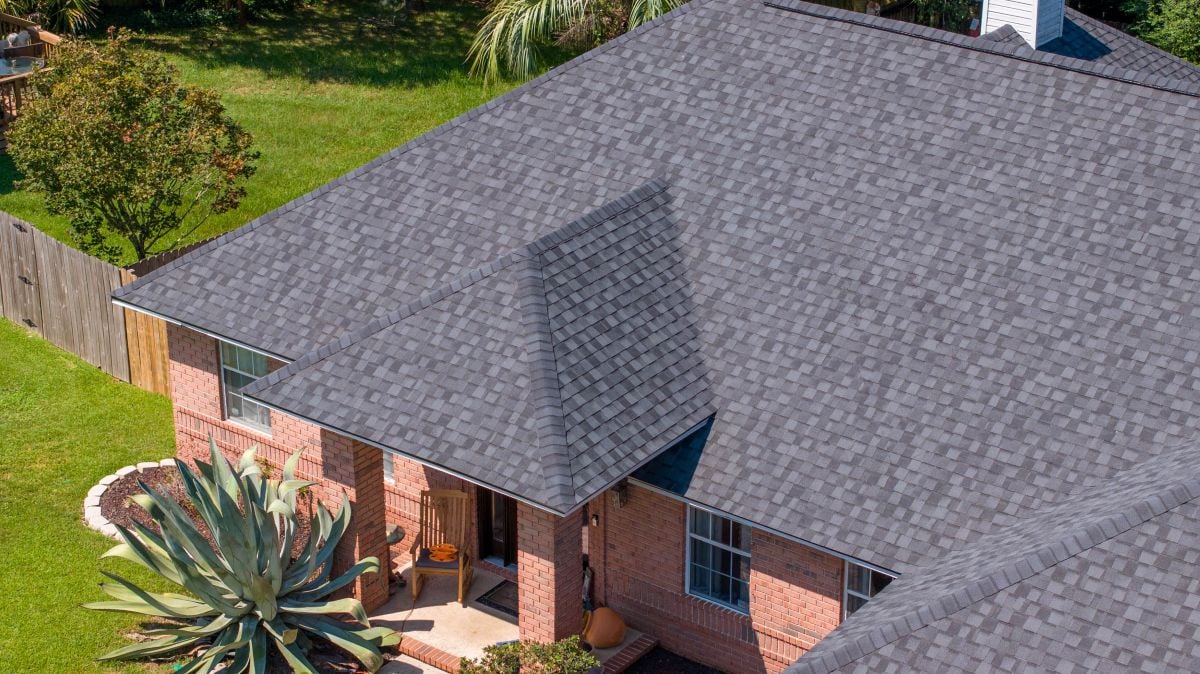
What Happens During a Roof Inspection? (Homeowner’s Guide)
September 3, 2026
9 minutes Read
Most homeowners schedule a roof inspection only after something goes wrong: a stain on the ceiling, a missing shingle spotted from the driveway, or a spike in the insurance renewal. But a professional roof inspection is most valuable before a problem becomes visible, when the issues a trained eye finds are still inexpensive to fix. Understanding what actually happens during an inspection helps homeowners prepare, ask better questions, and make sense of the findings. If you are ready to schedule one, our team offers professional roof inspections across northwest Florida. Here is what we cover:
- What a professional roof inspection includes
- The areas inspectors examine and what they look for
- How long an inspection takes and what it costs
- What happens after the inspection
- Frequently asked questions homeowners commonly ask

Why Roof Inspections Matter
A roof inspection is the only way to know the actual condition of a roofing system rather than guessing based on age or surface appearance. Shingles can look acceptable from the ground and still have granule loss, lifted sealant strips, or failed flashing at penetrations that will become leaks within a season. Conversely, a roof that looks rough from the street may have years of serviceable life remaining with minor repairs.
The National Roofing Contractors Association (NRCA) recommends that homeowners schedule a professional roof inspection at least twice per year, in spring and fall, as well as after any significant storm event. In Florida, where hurricane season runs June through November, and UV exposure is year-round, that cadence is especially important. A roof that passes a spring inspection in Milton, FL may need attention after a summer of tropical weather, making the fall inspection equally valuable.
We’re proud to serve home and business owners in Milton, FL, and nearby Santa Rosa County communities with thorough roof inspections that give homeowners a complete, honest picture of their roof’s condition.
7 Things a Professional Roof Inspection Covers
A thorough professional roof inspection is not a quick visual pass from the driveway. It is a systematic evaluation of every component of the roof system, from the surface down to the attic structure. Here is what a qualified inspector examines at each stage.
1. Exterior Surface Inspection
The inspector begins on the roof surface, evaluating the condition of the primary roofing material across all slopes. For asphalt shingle roofs, this includes:
- Granule condition: Bare patches or heavy granule accumulation in gutters indicate shingles are nearing end of life
- Sealant strip adhesion: Lifted shingle tabs that have lost sealant bond are vulnerable to wind uplift
- Cracking and curling: Brittle, curled, or cupped shingles signal UV degradation or moisture imbalance
- Missing shingles: Any gaps in the shingle field are flagged as immediate vulnerabilities
For metal roofs, the inspector checks panel seam integrity, coating condition, and fastener status on exposed fastener systems.
2. Flashing and Penetration Inspection
Flashing at every transition point is the highest-priority area in any roof inspection. Most active roof leaks originate at failed flashing rather than through the primary roof cover. The inspector checks:
- Pipe boot seals: Rubber or metal collars around every plumbing penetration are checked for cracking, shrinkage, and separation
- Chimney and skylight flashing: All step and counter flashing is checked for lifting, separation, and sealant integrity
- Valley flashing: Open or closed valley condition and any signs of debris accumulation that accelerates deterioration
- Roof-to-wall transitions: Any point where the roof meets a vertical wall surface is checked for proper step flashing and kickout flashing installation
3. Ridge, Hip, and Rake Inspection
The ridge cap, hip cap, and rake edge are the highest-exposure areas of any sloped roof. The inspector evaluates:
- Ridge cap nailing and sealing: Lifted or cracked ridge cap shingles are a common entry point for wind-driven rain
- Drip edge condition: Missing or improperly installed drip edge at eaves and rakes is noted, as this detail directly affects fascia and soffit longevity
- Hip and ridge alignment: Any displacement or buckling that indicates movement in the underlying deck

4. Gutters and Drainage Assessment
Gutters are evaluated as part of the roof system because their failure directly affects roof performance. The inspector checks:
- Debris accumulation: Full or partially blocked gutters that cause water backup under shingles at the eave
- Fastener and hanger condition: Gutters pulling away from the fascia at multiple points indicate systemic attachment failure
- Granule accumulation: Heavy granule deposits in gutters are documented as evidence of shingle surface wear
- Downspout discharge: Confirmation that downspouts are directing water adequately away from the foundation perimeter
5. Soffit and Fascia Inspection
The soffit and fascia are inspected for rot, paint failure, pest intrusion, and soffit vent blockage. In Florida’s humid climate, soffit rot often develops behind the fascia board where it is not visible without close inspection. Blocked soffit vents are noted because they compromise attic ventilation and accelerate shingle aging from heat buildup below.
6. Attic Inspection
A complete roof inspection includes access to the attic space. The inspector looks upward at the underside of the roof deck for:
- Water staining: Dark streaks or staining on rafters and sheathing that reveal the travel path of past or active leaks
- Daylight penetration: Any visible daylight through the deck indicates a gap in the roofing system
- Insulation condition: Wet or compressed insulation above the ceiling plane is noted, as it signals moisture intrusion and reduced thermal performance
- Ventilation adequacy: The presence and condition of ridge vents, soffit vents, and any powered ventilation is assessed against the attic square footage
7. Structural Observation
The inspector notes any visible sagging, deflection, or irregularity in the roofline that may indicate structural concerns beneath the surface. While a roof inspector is not a structural engineer, visible deck delamination, rafter damage, or ridge board deflection are flagged for further evaluation by the appropriate professional.
How Long Does a Roof Inspection Take?
A thorough residential roof inspection typically takes 45 minutes to two hours depending on the size and complexity of the roof, the number of penetrations, and whether attic access is available. Here is a realistic time breakdown:
| Inspection Component | Typical Time |
| Exterior surface walk | 20-45 minutes |
| Flashing and penetration check | 15-25 minutes |
| Gutter and soffit/fascia check | 10-20 minutes |
| Attic inspection | 10-20 minutes |
| Documentation and report prep | 15-30 minutes |
| Total | 45 minutes to 2 hours |
Homeowners should be available for the full inspection when possible. Walking the findings with the inspector at the conclusion of the visit gives you context for the written report and an opportunity to ask questions before the crew leaves.
What Happens After the Inspection
A professional roof inspection produces a written report documenting all findings with photographs of each identified issue. The report should clearly distinguish between items requiring immediate attention, items to monitor, and general maintenance recommendations.
- Immediate repair items: Active vulnerabilities that are currently allowing or are likely to allow water intrusion, open flashing, missing shingles, failed pipe boots
- Monitor items: Conditions that are not yet causing problems but should be reassessed at the next inspection, early granule loss, minor sealant shrinkage, surface algae
- Maintenance recommendations: Actions the homeowner can take between inspections, gutter cleaning, downspout extensions, tree trimming near the roofline
The written report also serves as documentation for insurance purposes, warranty maintenance requirements, and any future sale of the home. A roof with a documented inspection history is easier to insure, easier to sell, and carries a more defensible condition disclosure.
Frequently Asked Questions About Roof Inspections
Homeowners preparing for a professional roof inspection tend to ask the same questions. Here are direct answers to the most common ones.
How much does a professional roof inspection cost in Florida?
Many reputable Florida roofing contractors offer free roof inspections as a standard service, particularly when the homeowner is considering a repair or replacement. Independent inspector fees for a standalone inspection, one not connected to a contractor proposal, typically run $150 to $350 for a residential property. Wind mitigation inspections, which produce a formal report submitted to your insurance carrier, are typically $75 to $150 through a licensed wind mitigation inspector.
What is the difference between a roof inspection and a wind mitigation inspection?
A roof inspection assesses the overall condition of the roofing system and identifies maintenance and repair needs. A wind mitigation inspection specifically documents the wind-resistant features of the roof and structure, deck attachment method, roof cover type, roof shape, and roof-to-wall connections, for submission to the homeowner’s insurance carrier. The two inspections have different purposes and are typically performed by different inspectors, though a roofing contractor familiar with wind mitigation documentation can often advise on both.
Do I need to be home during the roof inspection?
You do not need to be home for the exterior portion of the inspection, but you should be present or represented for the attic access portion, and you should plan to be available at the end of the inspection for the findings walkthrough. The findings conversation at the end of the visit is where most of the value of a professional inspection is communicated; a written report alone is less useful than a walkthrough that explains the context and priority of each finding.
How do I prepare for a roof inspection?
Clear access to the attic hatch before the inspector arrives, and let the inspector know of any specific concerns, areas where you have seen staining, heard dripping, or noticed damage after a recent storm. Move vehicles out of the driveway to give the inspector clear access to ladder placement at all eave edges. If you have a previous inspection report, share it; the inspector can compare current conditions against the prior findings to assess the rate of change.
How often should a Florida home be inspected?
The NRCA recommends a minimum of two professional inspections per year, spring and fall, with an additional inspection after any significant storm event. In Florida, the spring inspection is best scheduled in April or May before the June start of hurricane season, and the fall inspection in October or November after peak storm activity. Homes with roofs over 15 years old benefit from annual inspections at minimum, as the rate of age-related deterioration accelerates in the second half of a roof’s service life.

Quality Roofing Solutions: Roof Inspections You Can Trust
A roof inspection is only as useful as the inspector performing it. At Quality Roofing Solutions, our inspection process covers every component of the roof system, surface, flashing, gutters, soffit, attic, and produces a written report with photographs that gives homeowners a complete, accurate picture of their roof’s condition. We have been inspecting roofs across northwest Florida for over 20 years, and we give homeowners straight answers rather than inflated findings designed to sell unnecessary work.
Book your free roof inspection and find out exactly what your roof needs and what it does not.