How to Tarp a Roof (6 Steps for Emergency Protection)
March 17, 2026
6 minutes Read
How to tarp a roof properly is a critical skill for homeowners dealing with sudden roof damage after storms, fallen trees, or severe leaks. A roof tarp is not a permanent solution, but it can provide essential short-term protection by keeping water out until repairs can be made. Knowing the correct steps and safety considerations helps homeowners reduce interior damage and avoid making the situation worse.
- Immediate protection: Limits water intrusion quickly.
- Damage control: Reduces interior and structural exposure.
- Temporary solution: Buys time before permanent repairs.
When Tarping a Roof Is Necessary
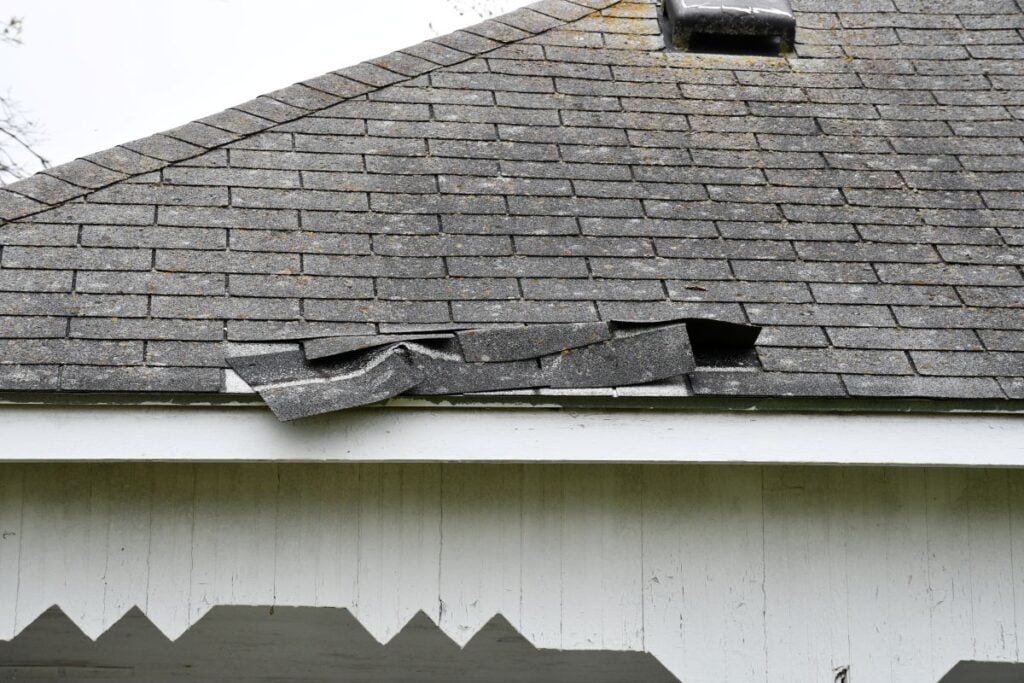
Roof tarping is typically used when damage occurs unexpectedly and immediate repairs are not possible. Storms, high winds, hail, or fallen debris often create openings that allow water to enter the home.
Tarping is most effective when performed as soon as conditions are safe. Delaying protection allows water to spread through insulation, ceilings, and framing, increasing repair costs and cleanup time.
- Storm damage: Wind or hail creates roof openings.
- Fallen debris: Tree limbs puncture roofing materials.
- Active leaks: Water enters during rainfall.
Roof tarping helps stabilize the situation temporarily.
What Roof Tarping Can and Cannot Do
A tarp provides short-term protection, but it does not fix underlying roof damage. Understanding its limitations helps homeowners set realistic expectations.
Tarping prevents additional water from entering the home but does not stop existing moisture issues beneath the surface. It should always be followed by a thorough roof inspection and repair.
- What it does: Blocks rain and debris temporarily.
- What it does not do: Repair structural or material damage.
- Timeframe: Designed for short-term use only.
Relying on a tarp long term can lead to hidden damage.
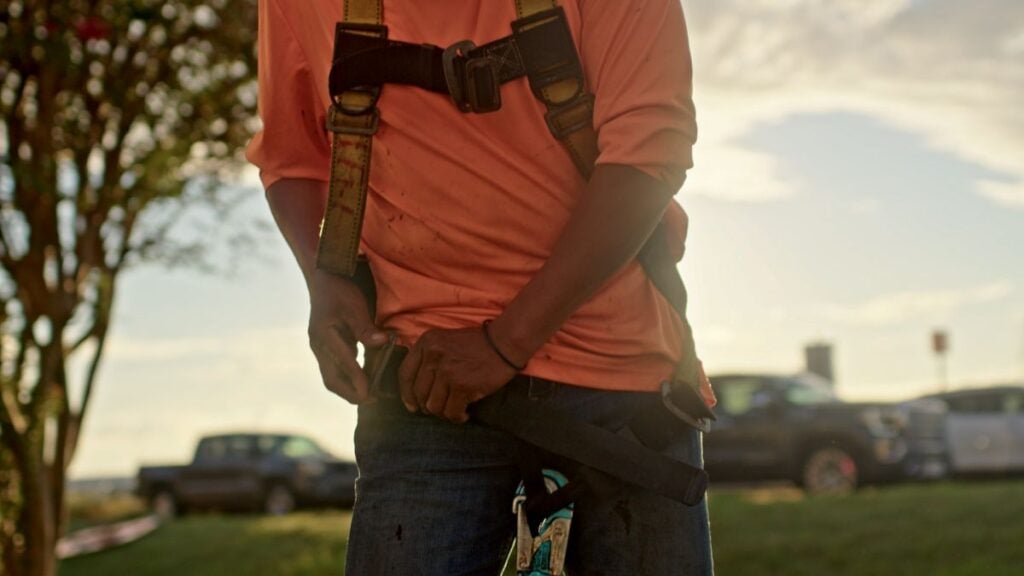
Safety Considerations Before Tarping a Roof
Roof tarping involves working at height, often after storms when surfaces are slippery. Safety should always be the top priority.
Homeowners should never attempt to tarp a roof during active storms or high winds. If conditions are unsafe, interior damage control is a better first step.
- Weather conditions: Avoid wind, rain, or lightning.
- Roof slope: Steep roofs increase fall risk.
- Protective gear: Gloves, non-slip shoes, and eye protection.
If safety is uncertain, waiting is the safer choice.
Tools and Materials Needed to Tarp a Roof
Preparation helps the process go more smoothly. Having the right materials reduces time spent on the roof and improves effectiveness.
- Heavy-duty tarp: Large enough to extend past damaged area.
- Wood boards: Used to secure tarp edges.
- Fasteners: Screws or nails for anchoring boards.
- Utility knife: Trims tarp to size.
- Ladder: Proper height and stable placement.
Using quality materials improves temporary protection.
6 Steps to Tarp a Roof for Emergency Protection
These steps outline a general method for safely tarping a roof. While every situation is different, following a structured approach reduces mistakes.
1. Identify the Damaged Area
Before climbing onto the roof, locate the damage from inside the home if possible. Water stains or dripping often indicate the general location.
Confirm the damaged section visually from the roof only when conditions are safe. Accurate identification prevents unnecessary tarp placement.
- Interior clues: Ceiling stains or attic moisture.
- Exterior signs: Missing shingles or visible holes.
- Targeted coverage: Focus on the affected area.
Precise placement improves effectiveness.
2. Choose the Correct Tarp Size
The tarp must extend well beyond the damaged area to prevent water from sneaking underneath. Small tarps are ineffective.
A larger tarp provides better coverage and anchoring options.
- Extended coverage: At least several feet past damage.
- One-piece tarp: Avoid seams when possible.
- Durable material: Resists tearing in wind.
Oversizing the tarp is better than undersizing.
3. Position the Tarp Above the Damage
The tarp should be placed so water flows over it rather than under it. This typically means extending it up toward the roof ridge.
Positioning the tarp too low allows water to travel beneath it.
- Uphill placement: Covers the damaged area fully.
- Smooth surface: Prevents water pooling.
- Correct orientation: Directs runoff downward.
Water direction is critical.
4. Secure the Top Edge First
The top edge of the tarp must be secured tightly to prevent wind from lifting it. Wood boards help distribute pressure evenly.
Fasten boards over the tarp edge rather than puncturing the tarp directly.
- Board anchoring: Reduces tarp tearing.
- Even pressure: Prevents loose spots.
- Strong attachment: Limits wind uplift.
A secure top edge keeps the tarp in place.
5. Anchor the Sides and Bottom
Once the top edge is secure, anchor the sides and bottom to prevent flapping. Loose edges allow water and wind underneath.
Work from the top down to maintain control.
- Side boards: Hold tarp flat against roof.
- Bottom anchoring: Prevents wind lift.
- Tight fit: Reduces movement and noise.
Proper anchoring extends tarp effectiveness.
6. Inspect and Monitor the Tarp
After installation, check the tarp for gaps or loose areas. Monitoring is important after weather changes.
Tarps may shift during wind or heavy rain.
- Post-install check: Ensures full coverage.
- Weather monitoring: Watch after storms.
- Interior inspection: Look for continued leaks.
Adjustments may be needed over time.
Common Mistakes When Tarping a Roof
Even well-intended efforts can go wrong. Avoiding common errors helps prevent further damage.
- Tarp too small: Leaves damage exposed.
- Improper anchoring: Allows wind to lift tarp.
- Walking on wet roofs: Increases injury risk.
Careful execution matters.
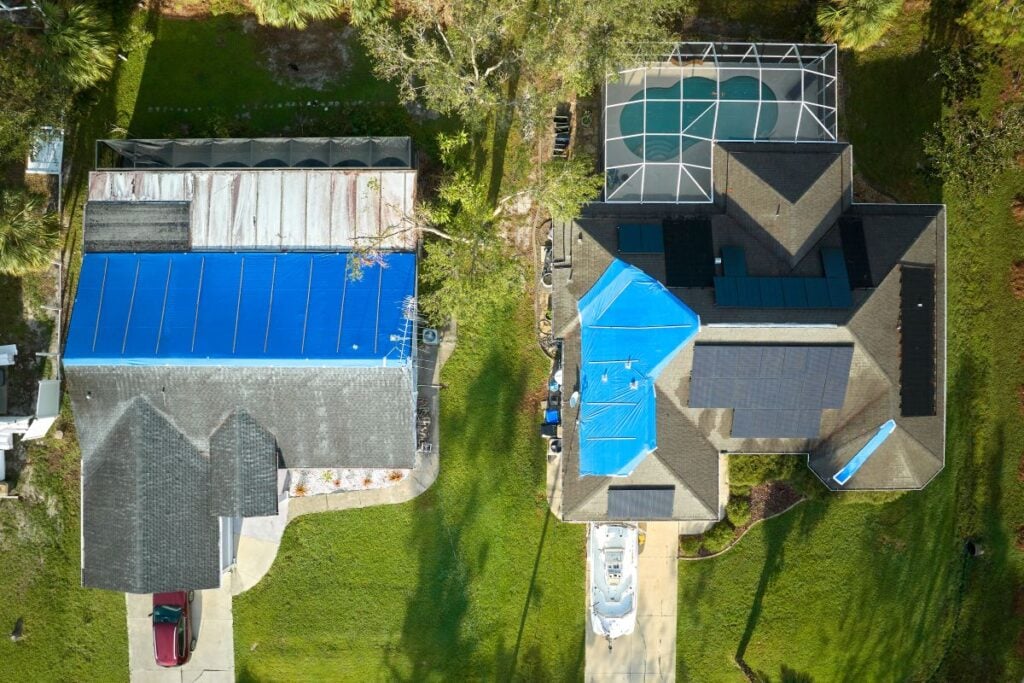
How Long a Roof Tarp Should Stay in Place
Roof tarps are designed for short-term use. Leaving them in place too long can trap moisture and hide damage.
Most tarps should only remain until proper repairs can be scheduled.
- Short duration: Temporary protection only.
- Inspection needed: Underlying damage may worsen.
- Follow-up repairs: Essential for long-term protection.
Timely repairs prevent bigger problems.
What to Do After Tarping Your Roof
Once the tarp is secure, focus on interior damage control. Drying affected areas reduces mold risk.
Document damage with photos and notes for reference. This helps track issues and plan repairs.
- Dry interior areas: Use fans or dehumidifiers.
- Remove wet materials: Prevents mold growth.
- Monitor leaks: Watch for changes.
Post-tarp steps matter just as much.
Temporary Protection Requires Follow-Up
Roof tarping is a valuable emergency step, but it is only part of the solution. Permanent repairs are necessary to restore full roof protection.
Understanding how to tarp a roof gives homeowners a way to act quickly while avoiding additional harm.
Get Guidance When Dealing With Emergency Roof Damage
Emergency roof situations are stressful and time sensitive. Knowing the correct steps helps homeowners respond calmly and effectively.
If you are dealing with sudden roof damage and need help understanding next steps, Quality Roofing can provide clear guidance to help you protect your home and plan repairs with confidence.